
 Christina Varvis
Despite the good weather, winter is bound to make one last surprise appearance before we are greeted with summer. Cheer your pessimistic self up and keep your hands toasty warm when it inevitably snows again by crafting your own custom felted mittens. The decoration possibilities are endless and they make a classy, yet surprisingly cheap gift that will impress your friends.
What you’ll need
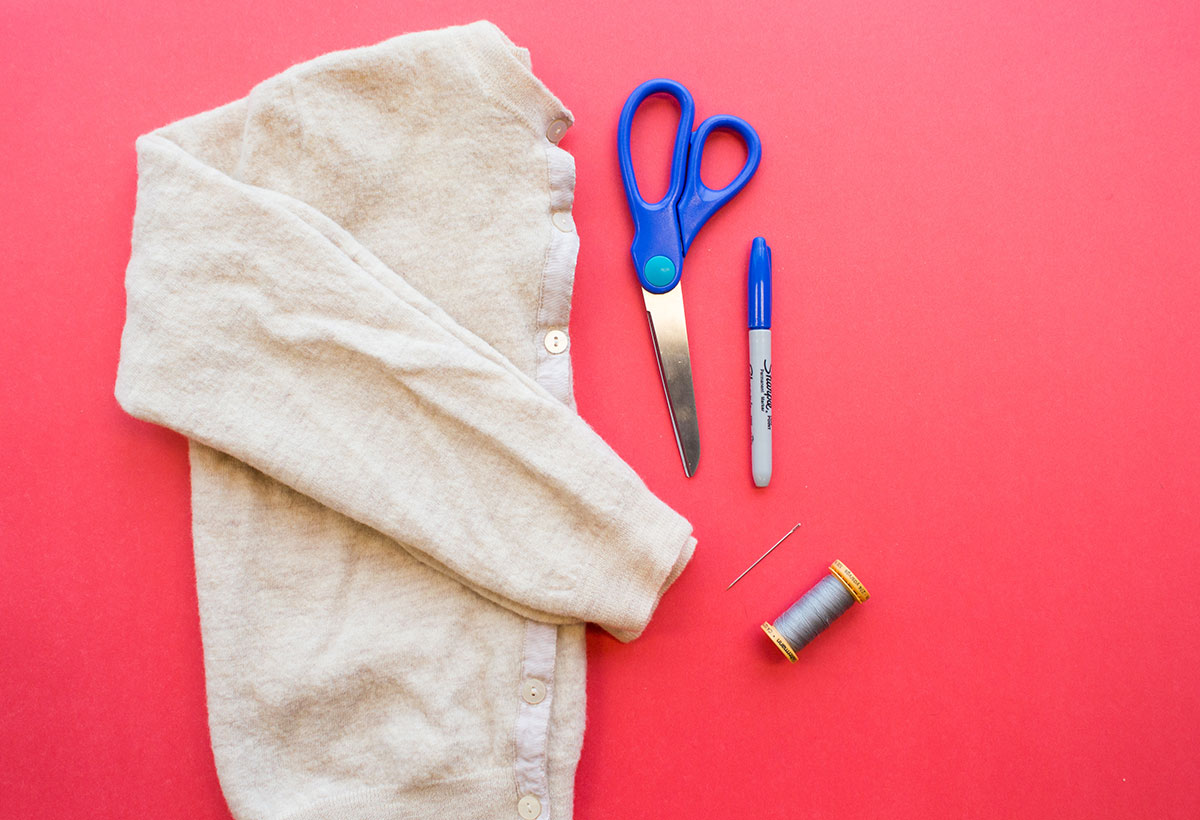
- A wool sweater
- Scissors
- A needle
- Thread
- A permanent marker
- Paper
Step 1
Hit up Goodwill or Value Village to find a cheap sweater. Check the label to make sure it’s 100 per cent wool. This is also a golden opportunity to get rid of that repulsive wool sweater that your roommate claims is trendy. Tell them you shrunk it by accident and thought you might as well repurpose it.
Step 2
Throw your sweater in the washing machine and wash it in hot water on a normal cycle. This will shrink it and turn the fabric into nice fuzzy felt. Pop it in the dryer and you’re ready to go.
Step 3
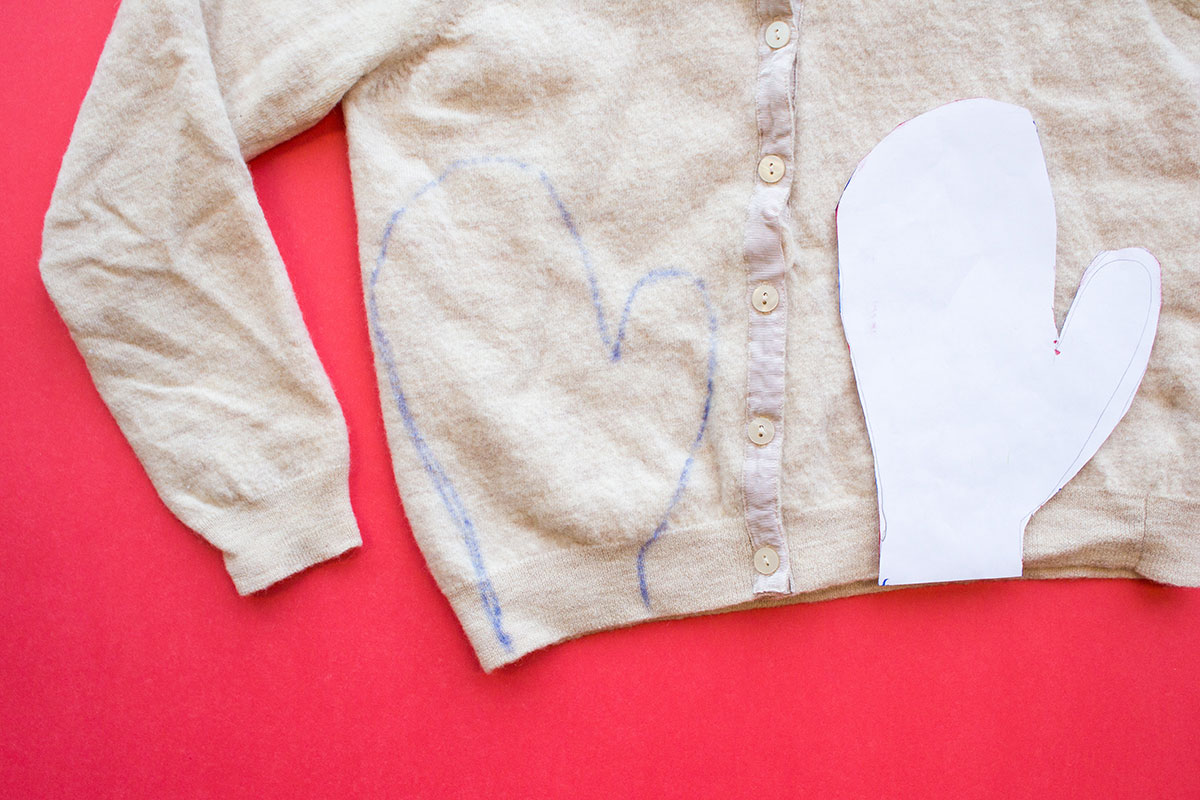
Use your hands as a stencil to draw mitten shapes on your paper to make your pattern. Make sure you draw the thumb longer than you think it should be and give your fingers lots of wiggle room. Cut out your simple but elegant pattern.
Step 4
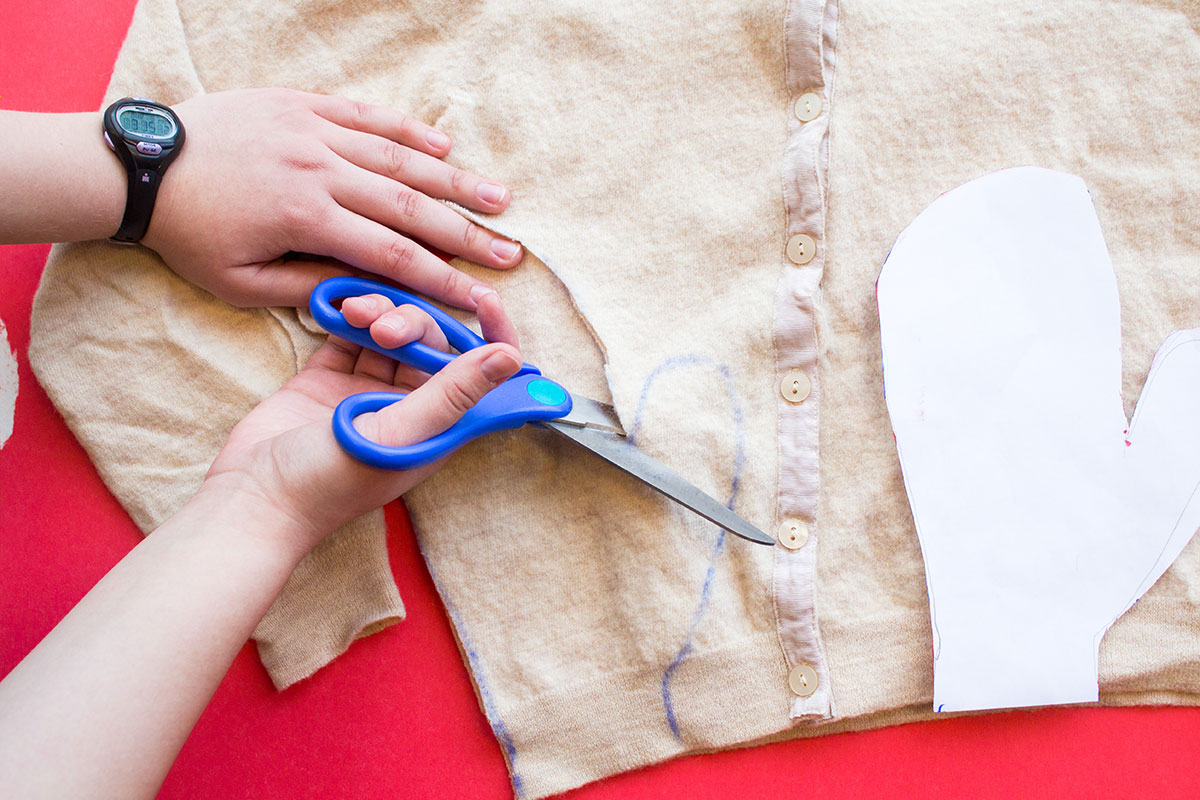
Turn your sweater inside out, find a spot where your pattern will fit and trace it with your marker. If you use the bottom of the sweater as your straight edge, you won’t have to worry about cutting a perfectly straight line. Repeat for the other mitten and cut out both mitten shapes. You will have to cut through two layers of sweater. When you’re done you should have four mitten-shaped pieces of felt.
Step 5
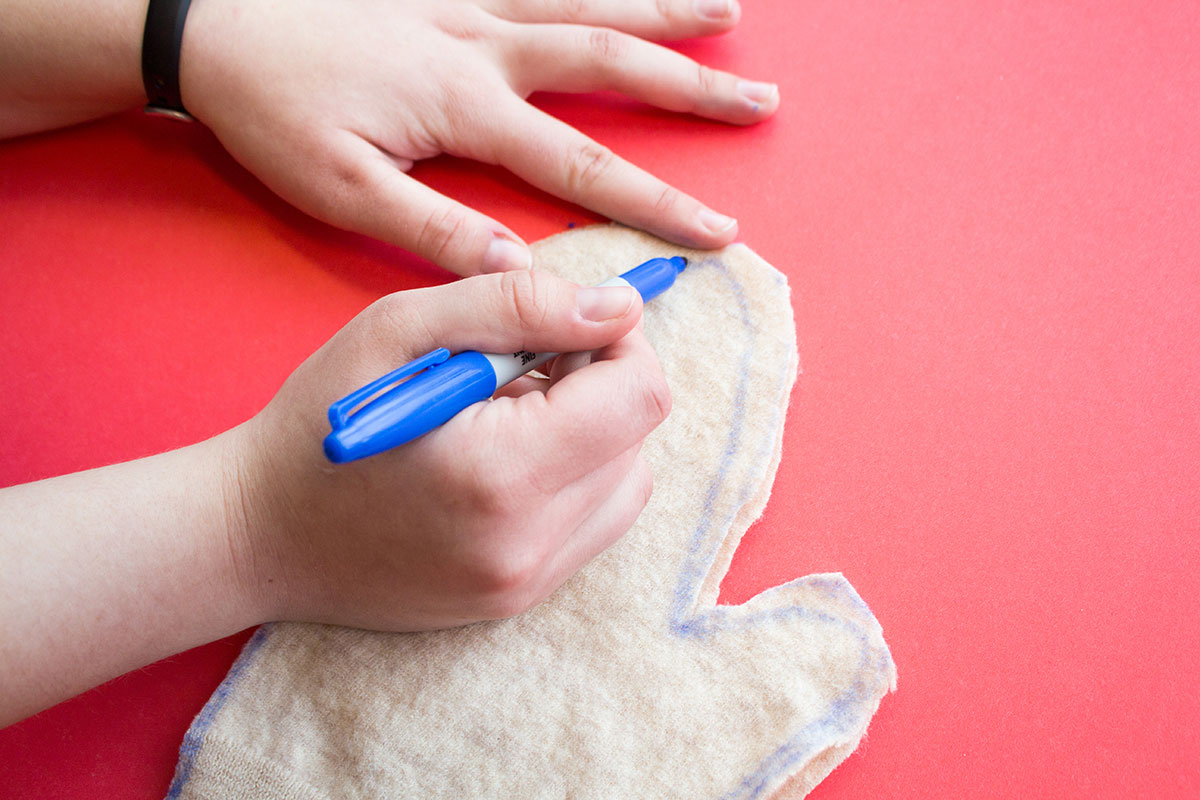
Make sure the front and back pieces of your mittens are lined up evenly. On each pair of mitten pieces, follow the curves of the mitten to trace a line that is about 1 cm from the edges. This line will be your nifty guide for where to sew together the mittens.
Step 6
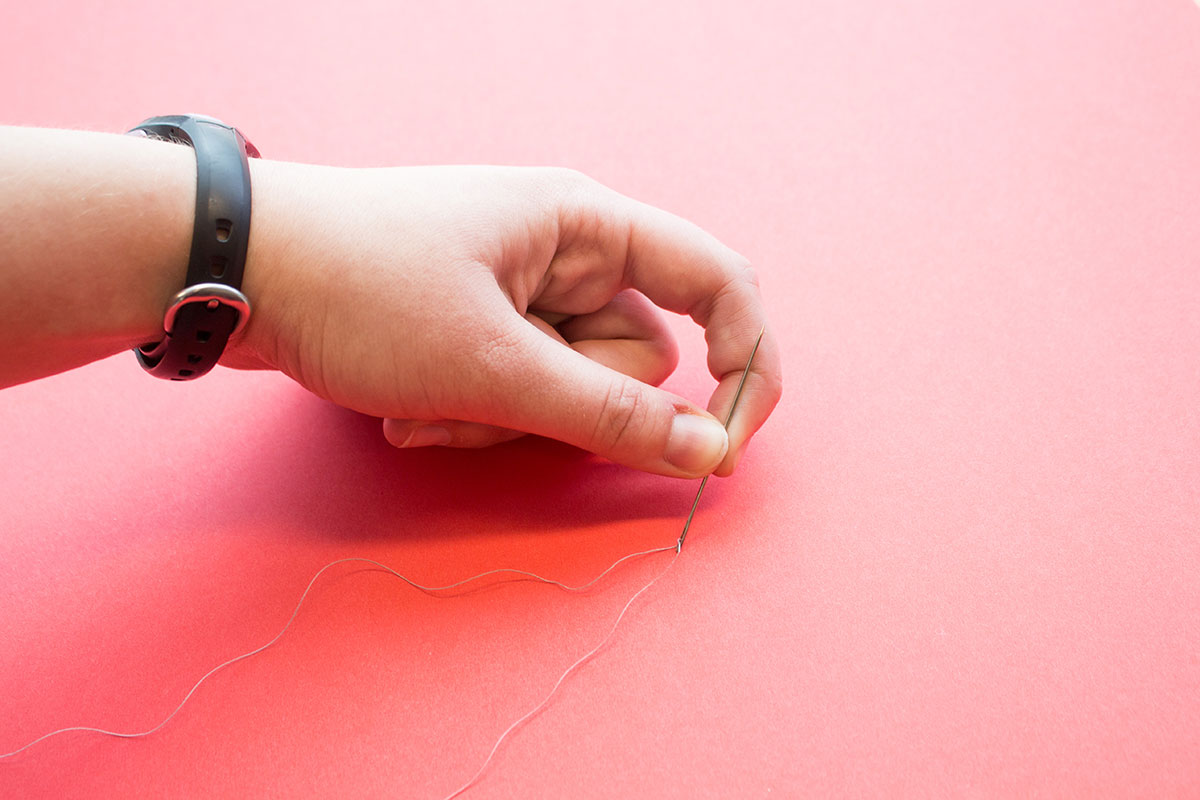
Double thread your needle. To do this, string your needle onto the thread like you’re making a needle necklace and tie a knot at the end. Make sure your needle is sharp and sturdy because the felt can be pretty dense, much like any member of the Kardashian clan.
Step 7
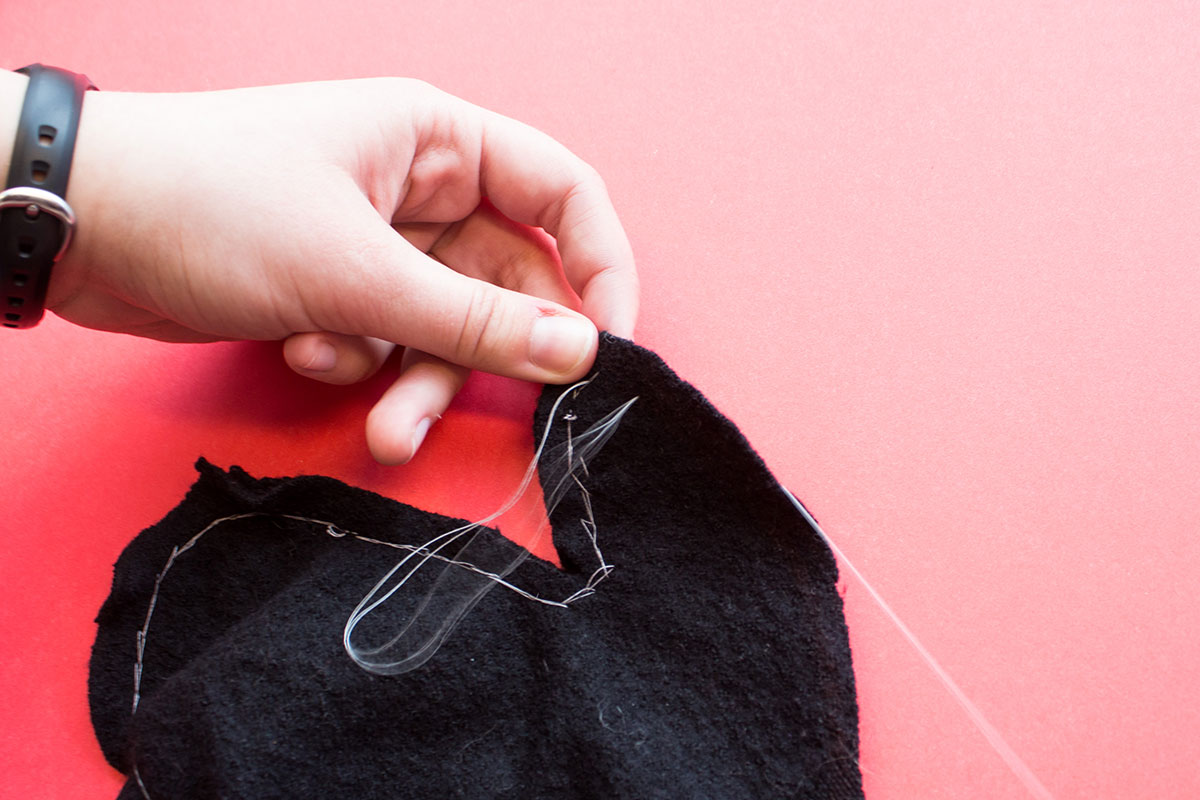
Start sewing along your marker line with a running stitch, a strong stitch that won’t fall out and that’s easy to master. To sew using running stitch, start by making a regular stitch, but the next time your needle pokes through the fabric, poke it up in the middle of your first stitch. Continue like this so that each stitch starts in the middle of the previous one. This step will take a while, so I’d recommend putting on a movie or binge-watching your new favourite show on Netflix.
Step 8
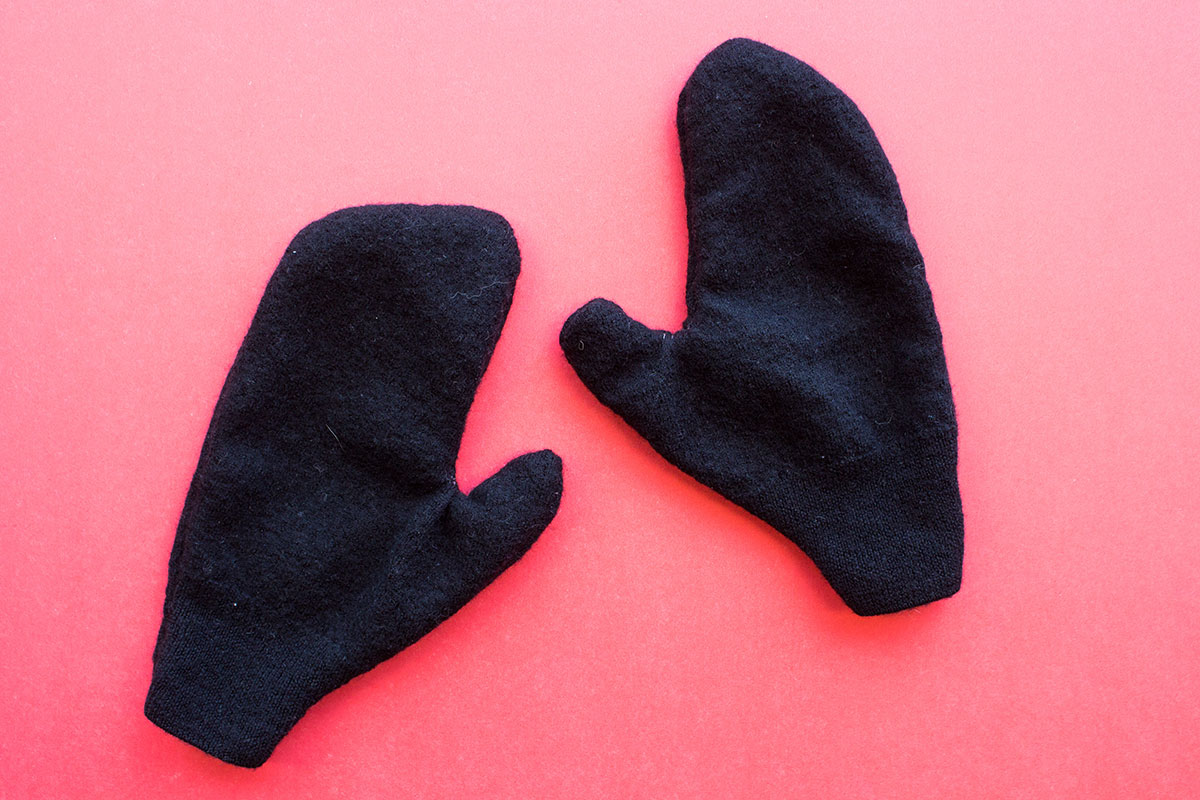
Turn your mittens right side out and admire your final product. If they’re a bit messy, you can marvel at their authenticity and rustic charm. If you feel like they are a little short, you can cut off the cuffs of your sweater, and sew them onto your mittens. Colourful buttons also make a festive decoration.


